Honda TRX700XX
Covered Models
- 2008 Honda TRX700XX
- 2009 Honda TRX700XX
Honda TRX700XX
| GENERAL DATA | |
|---|---|
| Producer | Honda |
| Model | TRX700XX |
| Year |
2008 – 2009 |

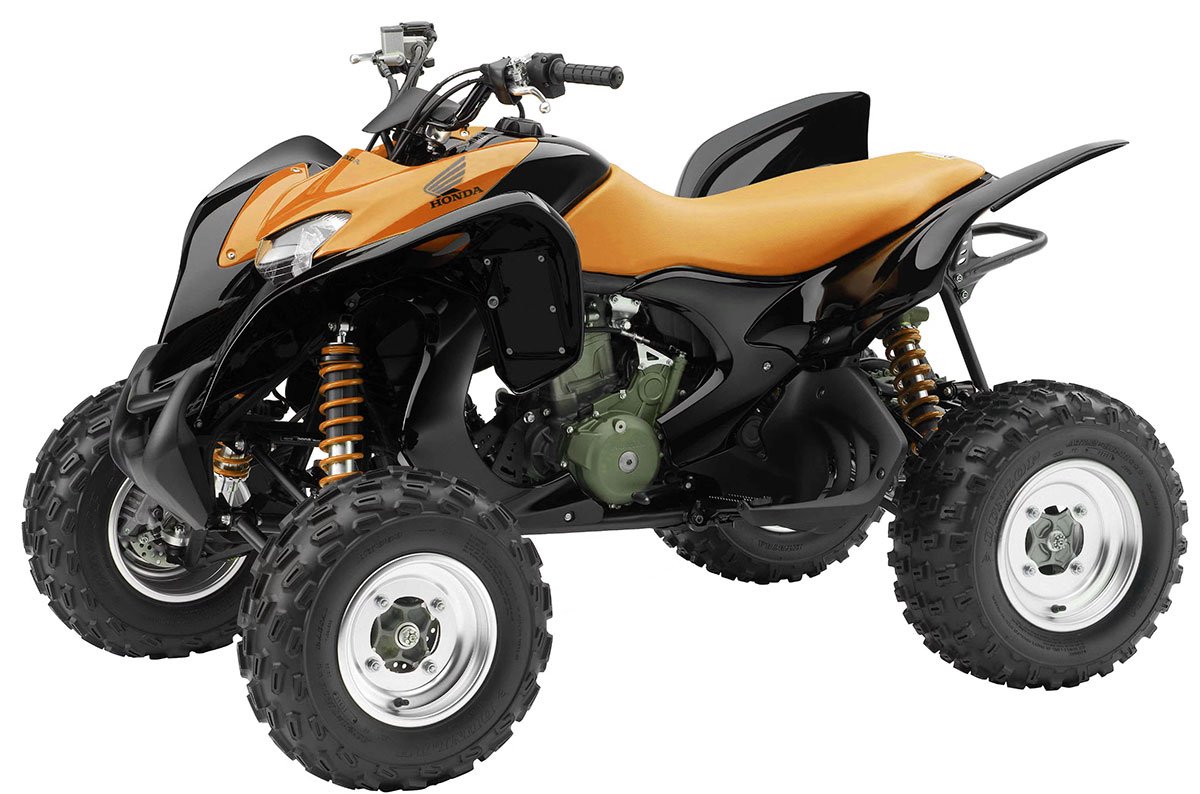
Image Honda TRX700XX
Honda TRX700XX Review
Let me tell you about the Honda 700XX that dropped back in ’08. Man, this thing really shook things up in the sport quad world! While everyone else was still pumping out those solid rear axle machines, Honda went and threw a fully independent rear suspension on this beast. Total game-changer for how these things are rode and handled.
I remember when it first hit the scene – the timing was perfect. The sport quad market was absolutely on fire back then. Everyone was obsessed with getting more power, more speed, more everything. But Honda? They zagged when everyone else zigged. Classic Honda move, right? Always gotta do their own thing. Instead of just joining the horsepower wars, they built something that could actually handle rough terrain while still ripping it up.
The 700XX only stuck around for ’08 and ’09 though – a pretty short run when you think about it. Honda didn’t mess with the design during that time either – what you got in ’08 was basically the same machine in ’09. No special editions, no major tweaks. That short production window has kind of made these things mini-legends in some circles. Guys are still arguing about them at the tracks and on forums all these years later!
That IRS system was seriously the talk of the pits. Some guys absolutely loved how it soaked up the nasty stuff and kept the rear wheels planted when things got sketchy. You could blast through whoops and rocky sections that would beat you to death on a traditional sport quad. The traction was insane in the rough stuff too – you could really hammer through terrain that would have a solid axle machine bouncing all over the place.
But man, it wasn’t all sunshine and rainbows. I knew plenty of die-hard racers who couldn’t stand the IRS setup. They’d complain that you couldn’t feel what the back end was doing as well, and it didn’t drift and slide as predictably as the solid axle quads they were used to. And let’s be honest – that thing was a porker! Definitely carried some extra pounds compared to the competition, which you could feel in the tight stuff.
Love it or hate it though, the 700XX was a ballsy move by Honda. These machines are still pretty special in the sport quad world. They took a chance on doing something different when everyone else was basically building variations of the same thing. Clean examples are getting harder to find these days, but there are still plenty of riders who swear by them for their mix of power and that magic-carpet ride over rough terrain. If you ever get the chance to throw a leg over one, do it – just to experience what Honda was trying to do with these things!
TEHNICAL SPECIFICATIONS
| ENGINE SPECIFICATIONS | |
|---|---|
| Displacement | 686.4 cm³ (41.87 cu-in) |
| Bore & stroke | 102.0×84.0 mm(4.02×3.31 in) |
| Compression ratio | 10.0:1 |
| Spark plug (standard) | ZFR7F-11 (NGK) or KJ22CR-L11 (DENSO) |
| Spark plug gap | 1.00-1.10 mm (0.039-0.043 in) |
| Valve clearance Intake (cold) | 0.15 mm (0.006 in) |
| Valve clearance Exhaust (cold) | 0.20 mm (0.008 in) |
| Idle speed | 1,500±100 min−1 (rpm) |
| Power | 53 horsepower |
| Top speed | 86 mph (138 km/h) |
| DIMENSIONS & CAPACITY | |
|---|---|
| Overall length | 1,815 mm (71.5 in) |
| Overall width | 1,165 mm (45.9 in) |
| Overall height | 1,135 mm (44.7 in) |
| Wheelbase | 1,260 mm (49.6 in) |
| Ground clearance | 260 mm (10.2 in) |
| Passenger capacity | Operator only |
| Maximum weight capacity | 110 kg (243 lbs) rider, all cargo and accessories |
| TRANSMISSION & GEAR RATIO | |
|---|---|
| Primary reduction | 2.027 |
| Sub transmission ratio | 1.087 |
| Final reduction | 2.642 |
| 1st gear ratio | 3.166 |
| 2nd gear ratio | 2.187 |
| 3rd gear ratio | 1.631 |
| 4th gear ratio | 1.272 |
| 5th gear ratio | 1.04 |
| Reverse gear ratio | 2.75 |
| Final drive | Chain DID520VМ RK520KZO |
| Noise level (ISO 5131) | 76 dB (A) |
| Vibration on seat | Not exceed 0.5 m/s2 |
| Vibration on handlegrip | 2.9 m/s2 |
| CHASSIS & SUSPENSION | |
|---|---|
| Caster | 5.3∘ |
| Trail | 23.2 mm(0.91 in) |
| Tyre size, front | AT21×7R10∗∗ DUNLOP KT363 |
| Tyre size, rear | AT22×9R11∗∗∗ DUNLOP KT378A |
| Tyre pressure, front & rear (cold) | Front: 35.0 kPa (5.1 psi) Rear: 42.5 kPa (6.2 psi) |
| Suspension front/rear | Independent double wishbone with fully adjustable piggyback reservoir shocks. |
| FUEL & LUBRICANTS | |
|---|---|
| Fuel recommendation | Unleaded petrol, research octane number of 95 or higher |
| Fuel tank capacity | 11.4 (3.01 US gal, 2.51 Imp gal) including reserve |
| Fuel tank reserve | 3.6 (0.95 US gal, 0.79 Imp gal) |
| Engine oil capacity | After disassembly: 2.4 (2.5 US qt, 2.1 Imp qt) After draining: 1.7 (1.8 US qt, 1.5 Imp qt) After draining & oil filter change: 1.8 (1.9 US qt, 1.6 Imp qt) |
| Engine oil recommendation | API Service Classification SE, SF or SG Honda 4-stroke oil or an equivalent |
| Cooling system recommendation | High quality ethylene glycol antifreeze containing corrosion protection inhibitors specifically recommended for use in aluminum engines |
| Cooling system capacity | 1.4 (1.5 US qt, 1.2 Imp qt) |
| Brake fluid | DOT 4 |
| ELECTRICAL & LIGHTS | |
|---|---|
| Battery | 12V-8Ah |
| Generator | 0.29 kW/5,000 min¯¹ (rpm) |
| Headlight (Low/High) | 12V 30/30W×2 |
| Brake/tail light | LED |
| PGM-FI indicator | 12V 3.4W |
| High coolant temperature indicator | 12V 3.4W |
| Neutral indicator | 12V 3.4W |
| Reverse indicator | 12V 3.4W |
| Main fuse | 30A |
| Other fuse | 15A 2, 10A |
| BRAKES | |
|---|---|
| Front | Dual hydraulic discs with twin-piston calipers. |
| Rear | Single hydraulic disc with a single-piston caliper. |
| TORQUE SPECIFICATION | |
|---|---|
| engine oil drain bolt (oil tank) | 20 N-m (2.0 kgf m, 15 lbfft ) |
| engine oil drain bolt (crankcase) | 24 N-m (2.4 kgf-m, 18 lbfft ) |
| oil filter cover bolts | 12 N-m (1.2 kgf-m, 9 lbf·ft) |
| spark arrester mount bolts | 12 N-m (1.2 kgf m, 9 lbf·ft) |
| final case nut | 88 N-m (9.0 kgf m, 65 lbfft·) |
| wheel nuts | 64 N-m (6.5 kgf m, 47 lbf·ft) |
Honda TRX700XX: The Nuts and Bolts
Alright, let’s talk about what made the 700XX tick. This beast was built on a seriously solid platform, and while everyone talks about that independent rear suspension, there’s a whole lot more going on under the plastic that made this quad special.
The heart of this machine was that beefy 686cc thumper. Man, this single-cylinder motor had torque for days – especially down low and in the midrange where you really need it on the trails. Honda slapped their liquid cooling system on it, which kept temperatures in check even when you were hammering it hard all day in the summer heat. None of that overheating nonsense you’d get with some of the air-cooled competition.
They went with their PGM-FI fuel injection system too, which was a big deal back then when most sport quads were still running carbs. The throttle response was crisp as hell – you’d just touch the thumb throttle and that thing would jump. Way better than the hesitation you’d get with a carb, especially on cold mornings. Plus, you didn’t have to mess with jetting every time the weather changed. The electric start was the cherry on top – no more looking like a fool kick-starting your quad while your buddies were already hitting the trails.
The 5-speed tranny with reverse was clutch for getting around. That reverse gear saved my bacon more times than I can count when I wedged myself between trees or rocks. And check this out – Honda went with a shaft drive instead of a chain. That was pretty unusual for a sport quad, but it meant way less maintenance. No more lubing and adjusting chains every other weekend! Some guys complained it felt different – a bit less snap when you hammered it – but I loved not dealing with chain maintenance.
Now for the suspension – the real star of the show. Full independent double-wishbone setup front AND rear. This wasn’t your typical sport quad design. Those Showa piggyback shocks were legit premium components, and you could dial them in just about any way you wanted. Compression, rebound, preload – you name it. The wheel travel was massive for its day, which meant you could blast through rough stuff that would beat you to death on other quads.
Stopping power? Hydraulic discs all around that would pull you down from speed real quick. The radial tires were a good compromise – not too aggressive for hard-pack, but enough bite for looser terrain. These weren’t hardcore race tires, but they worked well for the all-around riding the 700XX was built for.
The dimensions gave it that planted feel – you felt secure on it even at speed. The seat height was nice and low so you could really get over it in corners, and it had decent ground clearance for clearing logs and rocks without hanging up. Fuel tank wasn’t massive, but you could ride a good half-day without hunting for gas.
Now, we gotta talk about the elephant in the room – that 505-pound curb weight. Let’s not sugarcoat it, this thing was a TANK compared to most sport quads. You definitely felt those extra pounds when changing direction quickly or trying to muscle it around. But that weight also helped it hook up and feel more stable at speed, so it was a trade-off.
Bottom line, the 700XX was packing some serious tech for its day. That IRS was the headliner, but the whole package – from the fuel-injected engine to the adjustable suspension – was aimed at giving you something different from the typical sport quad experience. Was it perfect? Hell no. Was it unique and capable? Absolutely. These machines could take you places and do things other sport ATVs couldn’t, even if they weren’t gonna win any motocross races.

Honda TRX700XX: Aftermarket Upgrades – The Real Deal
Let me break down the aftermarket scene for the 700XX. These machines had a ton of upgrade potential – everything from cranking up that engine to dialing in the suspension just right. Here’s the lowdown on what you could do with these beasts:
Engine Performance – Getting More Grunt
When it comes to exhaust systems, we had quite a few players in the game. Yoshimura, HMF, Big Gun, Dasa – they all made pipes for the 700XX. If you wanted the cream of the crop, most hardcore riders swore by either Yoshi or Dasa. The Yoshi RS-2 was pretty much the gold standard – gave you power everywhere in the rev range and the fit and finish was top notch. Dasa’s full systems were absolutely killer for pure power though – the go-to if you were racing or just wanted to smoke your buddies on the trails.
Price-wise, if you had deep pockets, those titanium or high-grade stainless Dasa systems would set you back anywhere from 700 to 1200 bucks or more. But if you were on a budget, you could snag a slip-on from HMF or one of the lesser-known brands for maybe 300 to 500. Just remember, slip-ons were mostly about the sound – you weren’t getting nearly the performance bump you’d see with a full system.
Since the 700XX ran fuel injection, you definitely needed a fuel controller after messing with the exhaust or air intake. Dynojet’s Power Commander was the go-to for most guys, but HMF had their Fuel Optimizer, and Vortex made some good stuff too. The Power Commander V was super popular because you could get custom maps for whatever setup you were running. The Vortex X10 ECU was even more trick – you could adjust ignition timing and it came with multiple maps pre-loaded.
The Vortex wasn’t cheap though – you’d be looking at dropping 500 to 800 bucks. If your wallet was feeling light, you could grab an HMF Fuel Optimizer or something similar for about 200 to 350. They’d get the job done, but you didn’t have the fine-tuning options of the higher-end stuff.
For air filters and intakes, K&N, UNI, and Fuel Customs were the main players. The Fuel Customs intake systems were absolute monsters for airflow – you’d feel the difference immediately, especially with other engine mods. K&N filters were everywhere because you could just clean and re-oil them instead of buying new ones all the time.
A full-blown Fuel Customs intake setup with a new tube and airbox mods would run you 300 to 500 bucks. If you just wanted a drop-in high-flow filter from K&N or UNI, you were looking at 50 to 100 smackers.
Now, if you were really serious about power, you’d be looking at big bore kits and internal engine work. CP Pistons, Wiseco, and various engine builders offered pistons, cams, valve springs – the works. What was “best” here really depended on your goals and your engine builder’s skills. A good set of high-compression pistons from CP or Wiseco matched with the right cam profile could wake that motor up in a serious way.
This stuff wasn’t cheap though. A full-blown big bore kit with forged pistons, performance cams, and proper head porting work from a reputable builder would easily run 1500 to 3000 bucks or more. If you wanted to dip your toes in, you could grab some higher compression pistons or a mild cam for a few hundred each, but the real power came from doing it all right.
Suspension – Making It Float
The stock suspension on the 700XX was decent, but the aftermarket took it to another level. Elka, Fox, and PEP were the big names here. The Elka Stage 5s, Fox Podium RC2s, and PEP ZPS shocks were absolute game-changers. These things offered way more adjustability than stock – high and low-speed compression, rebound tuning, and they could be custom valved for your weight and riding style.
A full set of premium shocks for all four corners would sting your wallet though – we’re talking 2000 to 4000 bucks or more for the really good stuff. The budget route was either rebuilding and re-valving your stock Showas or finding some entry-level aftermarket shocks, which might run you 500 to 1000 for a set.
For the guys who wanted to go big, long travel kits from Houser and Walsh Race Craft were the ticket. These gave you longer A-arms, beefier tie rods, and sometimes longer shocks too. You’d get more wheel travel and a wider stance, which meant better stability and handling in the nasty stuff. Walsh kits were considered the Cadillac of long travel setups – absolutely bombproof construction and the geometry was spot-on.
A full Walsh Race Craft setup with premium shocks was a serious investment – 3000 to 6000 dollars or more. Some companies made basic widening kits that didn’t actually increase travel, and these were cheaper, but you got what you paid for.
For steering, Lonestar Racing, Houser, and Precision Racing Products made great stuff. An anti-vibe steering stem and a good stabilizer made a world of difference, especially in rough terrain. The Precision Racing Products dual-valve stabilizers were incredible – they’d keep the bars from getting ripped out of your hands in the rough, but still let you steer naturally in the smoother sections.
A top-shelf stabilizer from Precision would set you back 500 to 700 bucks, with anti-vibe stems running 300 to 500. More basic stabilizers were available for less, but again, you get what you pay for with this stuff.
Drivetrain – Putting Power to the Ground
Even though the 700XX had a solid drivetrain from the factory, there were still upgrades to be had. Hinson and EBC made upgraded clutch components that could handle more power and abuse. Hinson was pretty much the gold standard – their clutches were bombproof and had super smooth engagement.
A complete Hinson clutch setup would run you 500 to 800 bucks. If you just wanted better performance without breaking the bank, EBC clutch plates were a good middle ground.
Since the 700XX ran a shaft drive, you didn’t have to worry about sprockets and chains like on most sport quads. That was actually one of the cool things about these machines – less maintenance.
For axles, Rhino Brand (from SuperATV) and Gorilla made heavy-duty replacements that could take way more abuse than stock. This was essential if you were running bigger power or hitting gnarly terrain regularly. Gorilla axles were practically bulletproof – I’ve seen those things take abuse that would snap stock axles like twigs.
A set of Gorilla heavy-duty axles would run you 800 to 1200 bucks or more. Rhino Brand axles were a bit more affordable and still way stronger than stock.
Braking – Stopping Power
The stock brakes weren’t bad, but there’s always room for improvement. EBC, Galfer, and Sixity all made upgraded pads and rotors. EBC’s Double-H Sintered pads and Galfer’s Wave Rotors were super popular – they’d give you better initial bite and way better fade resistance when you were riding hard.
A set of high-performance rotors and sintered pads would cost you a few hundred per end. Basic replacement pads from good brands were obviously much cheaper.
One of the best bang-for-buck brake upgrades was stainless steel braided lines from Streamline or Galfer. These gave you a much firmer lever feel because they didn’t expand under pressure like the rubber stock lines. A full set would run you between 100 and 200 bucks – totally worth it for the improved feel and performance.
The Other Stuff
Of course, there was all kinds of other gear you could bolt on. AC Racing, DG Offroad, and Pro Armor made sweet nerf bars and bumpers to protect both you and the quad. Prices varied depending on how fancy you wanted to get.
Handlebars from Renthal and Pro Taper let you dial in your riding position just right, and they offered different materials to cut weight. Aftermarket levers, grips, and throttles were popular too – made everything feel more precise.
If you rode at night, LED light bars and auxiliary lights from Rigid Industries or Baja Designs would light up the trail like daylight. Night and day difference compared to stock lighting.
Plenty of guys swapped out the stock wheels and tires for something that suited their riding style better. ITP, Maxxis, and STI all made great rubber in different patterns and sizes. The right tire for your terrain made a massive difference in how the quad handled.
And of course, everyone wanted their ride to look unique, so custom graphics kits and seat covers were huge. You could make your 700XX look factory fresh or completely custom – whatever floated your boat.
The beauty of these machines was how much you could customize them. Whether you were a weekend warrior or a serious racer, there were upgrades for every budget and riding style. That’s what made the 700XX community so cool – everyone’s quad was a little different, built for their specific needs.
Honda TRX700XX: How It Stacked Up Against the Competition
When Honda dropped the 700XX on us back in ’08, the sport quad world was already packed with some serious machines. The big difference? While everybody else was running solid rear axles, Honda went and threw that independent rear suspension on there – totally changing the game. Let me break down how it measured up against the heavy hitters of that era.
Yamaha Raptor 700R – The Undisputed King
Man, the Raptor 700R was absolutely DOMINATING the big-bore sport quad scene when the 700XX showed up. That 686cc thumper was an absolute monster – torquey as hell down low but could still scream up top when you wrung its neck. The chassis was light and nimble, making it an absolute riot on wide-open terrain like desert trails and sand dunes.
The thing about the Raptor was that solid rear axle – guys absolutely loved how predictable it was when you pitched it sideways. You could feel exactly what the rear end was doing and control your slides with the throttle like it was an extension of your body. The aftermarket support was insane too – you could build these things a million different ways. No wonder they sold like hotcakes and Yamaha kept them in production forever.
Suzuki LT-R450 – The Track Weapon
The LT-R450 was a different animal altogether. That high-revving 450cc screamer was more about handling than brute force. These things were like surgical instruments on the track – super precise and ridiculously nimble. The fully adjustable long-travel suspension could be dialed in perfectly for jumping and cornering.
I knew a bunch of racers who swore by these machines. Yeah, they didn’t have the raw grunt of the 700s, but they’d dance circles around the bigger quads in tight sections. The power delivery was so snappy and responsive – you’d just think about getting on the gas coming out of a corner and it was already hooking up and shooting you forward.
Kawasaki KFX450R – The Green Machine
Kawasaki’s entry in the 450 class was breathing down Suzuki’s neck with their KFX450R. Another fuel-injected 450cc four-stroke, but with Kawi’s own flavor. These things looked mean as hell with that aggressive bodywork, and they came ready to race right out of the crate.
Like the LT-R, the KFX was all about being light and flickable. Corner-to-corner transitions were lightning quick, and you could change lines mid-corner without fighting the machine. Sure, it didn’t have the brute power to hang with the 700s on long straightaways, but most tracks don’t have many of those anyway.
How the 700XX Fit In
So where did the 700XX land in all this? Honestly, it was kind of the oddball in the best possible way. That independent rear suspension was a whole different experience – it soaked up rough terrain like nothing else in the sport quad world. You could hammer through whoops and rocky sections that would have you hanging on for dear life on a solid axle quad.
The downside? That IRS setup made the 700XX noticeably heavier than the competition. You could feel those extra pounds when changing direction quickly or trying to get it airborne. And while the rear end was super planted, it didn’t give you that same sliding feel that the Raptor had – which was either a pro or a con depending on your riding style.
Power-wise, it went toe-to-toe with the Raptor 700R. Both had big, torquey engines that could pull forever. But while the Raptor was a sand dune hero, the 700XX was more of a technical trail master. And forget about trying to keep up with those nimble 450s in tight woods or on a track with lots of quick transitions – the weight difference was just too much.
When it comes down to it, the 700XX wasn’t trying to be another Raptor or LT-R. Honda was doing their own thing, building a sport quad that could handle gnarly terrain while still having the power to rip when things opened up. It was for riders who wanted sport quad performance but didn’t want to get beat up on rough trails.
Some guys got it and absolutely loved it. Others couldn’t get past that different feel compared to the solid axle quads they were used to. That’s why the 700XX built its own little cult following instead of dominating the sales charts. It wasn’t better or worse than the competition – just different in a way that some riders really appreciated.
Honda TRX700XX – Troubleshooting
| TROUBLESHOOTING | ||
|---|---|---|
| Problem | Description | Possible Solution |
| Engine Won’t Start | Engine fails to turn over or turns over slowly without starting. | Check battery charge, check fuses, inspect starter motor and solenoid connections, ensure fuel is present. |
| Engine Won’t Start | Engine turns over but doesn’t fire. | Check spark plug condition, check for fuel delivery (fuel pump, injectors), check ignition system components. |
| Engine Runs Poorly | Engine idles rough, hesitates, stumbles, or lacks power. | Check spark plug, inspect air filter, check fuel injection system (leaks, pressure, injectors), check exhaust for obstructions. |
| Engine Overheats | Engine temperature rises above normal operating range. | Check coolant level, inspect radiator for blockages, check thermostat operation, verify radiator fan function. |
| Clutch Slipping | Engine revs high during acceleration without a corresponding increase in speed. | Inspect clutch plates for wear, check clutch cable adjustment (though 700XX has hydraulic clutch), check oil type. |
| Brakes Feel Spongy | Brake lever or pedal feels soft and doesn’t provide firm stopping power. | Bleed the brake system to remove air, check brake fluid level, inspect brake lines for leaks. |
| Brakes Squeal | Brakes make a high-pitched noise during application. | Inspect brake pads for wear or glazing, check rotor condition, ensure proper caliper and pad installation. |
| Suspension Feels Soft/Bouncy | ATV bottoms out easily or feels uncontrolled over bumps. | Adjust shock preload and damping settings, check for leaking shock seals, consider shock rebuild or replacement. |
| Excessive Bump Steer | Handlebars jerk or move unexpectedly when hitting bumps. | Check tire pressure, inspect tie rod ends and ball joints for wear, verify proper steering stem and handlebar mounting. |
| Rear Noise (Whining) | Whining sound coming from the rear of the ATV. | Check rear differential fluid level and condition, inspect differential bearings for wear or damage. |
| Battery Keeps Dying | Battery loses charge quickly or won’t hold a charge. | Check for parasitic draw, test charging system output (alternator/rectifier), inspect battery terminals for corrosion, test battery condition. |
| Lights Not Working | Headlights, taillights, or indicator lights fail to illuminate. | Check fuses, inspect bulbs, check wiring connections and switches for faults. |
| Fuel Pump Not Priming | No sound from the fuel pump when the ignition is turned on. | Check fuel pump fuse, inspect fuel pump wiring connections, fuel pump may be faulty. |
| Engine Backfiring | Loud pop or bang from the exhaust. | Check for lean fuel conditions, inspect exhaust system for leaks, check ignition timing. |
| Difficult Shifting | Hard to change gears or transmission feels notchy. | Check clutch adjustment (if applicable), inspect gear shift linkage, ensure proper engine oil level and type. |
| ATV Pulls to One Side | ATV drifts to the left or right without intentional steering input. | Check tire pressure, inspect wheel alignment, check for bent suspension components, check for uneven brake drag. |
| Digital Display Issues | Speedometer, RPM gauge, or other readings are incorrect or absent. | Check wiring connections to the display unit and sensors, the display unit or a sensor may be faulty. |
| Reverse Gear Issues | Difficulty engaging or disengaging reverse gear. | Check reverse linkage adjustment, ensure proper clutch operation. |
| Coolant Leaks | Visible leaks of coolant from the engine or radiator. | Inspect radiator hoses and connections, check radiator for damage, check water pump seals. |
| Radiator Fan Not Working | Engine overheats and the radiator fan doesn’t turn on. | Check radiator fan fuse, inspect fan motor wiring, fan motor or temperature sensor may be faulty. |
Honda TRX700XX – Q & A
ENGINE
SUSPENSION & STEERING
BRAKES
DRIVETRAIN & OTHER STUFF
ELECTRICAL SYSTEM
COOLING SYSTEM
Honda TRX700XX – Maintenance Schedule
| MAINTENANCE SCHEDULE | |||
|---|---|---|---|
| ITEM | Type of maintenance -> whichever comes first | Hours | Miles |
| Fuel line | Inspect | 200 | 1200 |
| Throttle operation | Inspect | 200 | 1200 |
| Air cleaner housing | Clean | 100 | 600 |
| Air cleaner housing drain tube | Inspect | 100 | 600 |
| Spark plug | Inspect | 100 | 600 |
| Valve clearance | Inspect | 100 | 600 |
| Engine oil | Replace – every 12 months or whichever comes first – > | 100 | 600 |
| Engine oil filter | Replace | 100 | 600 |
| Engine oil strainer screen in oil tank | Clean | 200 | 1200 |
| Radiator coolant | Inspect | 100 | 600 |
| Cooling system | Inspect | 100 | 600 |
| Drivetrain boots | Inspect | 100 | 600 |
| Drive chain | Inspect & Lubricate | 50 | 300 |
| Drive chain slider | Inspect | 100 | 600 |
| Brake fluid | Inspect | 100 | 600 |
| Brake pads wear | Inspect | 200 | 1200 |
| Brakelight switch | Inspect | 100 | 600 |
| Brake system | Inspect | 100 | 600 |
| Skid plates, engine guard | Inspect | 100 | 600 |
| Scraper | Inspect | 100 | 600 |
| Clutch system | Inspect | 100 | 600 |
| Suspension | Inspect | 100 | 600 |
| Spark arrester | Clean | 100 | 600 |
| Nuts, bolts, fasteners | Inspect | 200 | 2000 |
| Wheels/tires | Inspect | 100 | 600 |
| Tie-rod and joint boots | Inspect | 100 | 600 |
| Steering shaft holder bearings | Inspect | 200 | 1200 |
| Steering system | Inspect | 200 | 1200 |