Yamaha Raptor 660R
Covered Models
- 2001 Yamaha Raptor 660R – YFM660R
- 2002 Yamaha Raptor 660R – YFM660R
- 2003 Yamaha Raptor 660R – YFM660R
- 2004 Yamaha Raptor 660R – YFM660R
- 2005 Yamaha Raptor 660R – YFM660R
Yamaha Raptor 660R
| GENERAL DATA | |
|---|---|
| Producer | Yamaha |
| Model | Raptor |
| Year |
2001 – 2005 |

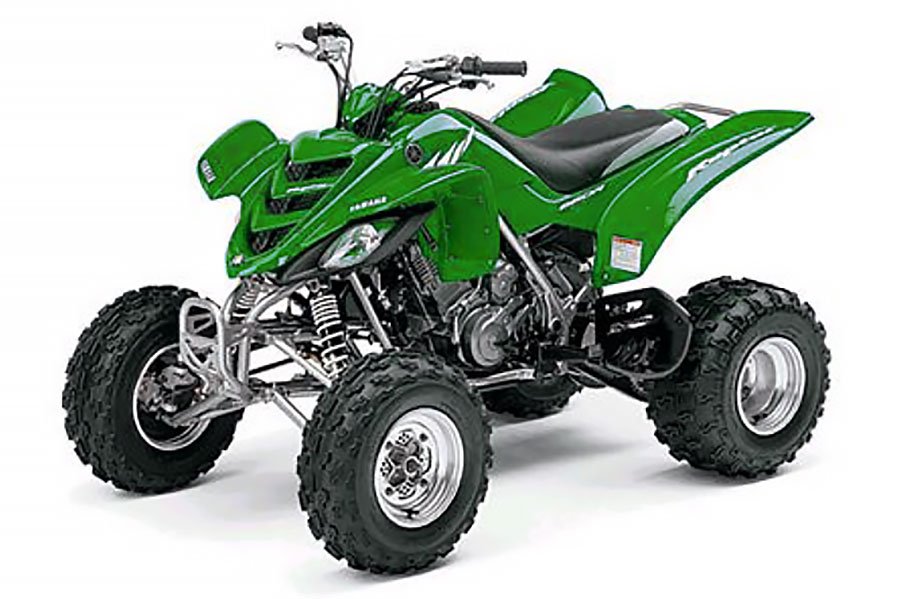
Image Yamaha Raptor 660R
The Birth of a Beast – Yamaha Raptor 660R
Man, when Yamaha dropped the Raptor 660R back in 2001, it completely flipped the ATV world on its head. I mean, everyone was cruising around on those 400cc sport quads like the Honda TRX400EX thinking they were hot stuff, then BAM! – Yamaha rolls out this absolute monster with a 660cc engine. Nobody saw that coming! You should’ve seen the looks on people’s faces at the trails that year – total game-changer.
This beast wasn’t just about the numbers though. Sure, that liquid-cooled, four-stroke, 660cc single-cylinder engine was pumping out power that made everything else look like kids’ toys, but what really blew me away was how they managed to keep it feeling nimble. You’d think something with that much muscle would handle like a tank, but Yamaha somehow nailed the chassis design. The way it balanced raw power with actual agility was pretty mind-blowing for its time.
The Raptor Years
The 660R only stuck around from 2001 to 2005, which honestly isn’t that long for such a legendary machine. Even though they replaced it with the Raptor 700R in ’06, ask any die-hard quad rider and they’ll tell you the 660 was something special – it had this raw, rebellious character that the more refined 700R just couldn’t quite capture.
If you’re looking at picking one up, it’s worth knowing how they evolved:
- The 2001-2002 models were the original bad boys – stupid amounts of power, but, not gonna lie, they had some quirks. Those starter clutches were notorious for giving out.
- By 2003, Yamaha had listened to riders and beefed up the rear axle carrier and added some crucial frame reinforcements. Made a huge difference.
- The 2004-2005 models were definitely the sweet spot – all the kinks worked out, better suspension, and some tweaks to the gearing that made them even more rideable.
I always laugh when people talk about the Raptor 660 being designed as a “high-performance trail ATV” because within weeks of release, you’d see these things absolutely tearing up sand dunes, makeshift race tracks, and wide-open desert runs. The way they could power up steep climbs was insane, and they ate up loose terrain for breakfast. That said, if you were new to quads, you had to respect the Raptor – being tall and powerful meant it could get a bit tippy if you didn’t know what you were doing!
The Special Stuff
Yamaha didn’t go crazy with different versions like car manufacturers do, but they did throw out some special editions that were pretty sweet, especially in the later years. Nothing crazy in terms of performance differences, but you could grab SE models with some killer exclusive color schemes, those eye-catching polished wheels, and graphics packages that made your riding buddies jealous.
The heart of the beast stayed the same throughout – they didn’t mess with perfection – but those visual upgrades definitely turned heads at the trails and kept things fresh year after year. I still remember the first time I saw that black and yellow SE model… nearly traded my regular Raptor on the spot!
TEHNICAL SPECIFICATIONS
| ENGINE | |
|---|---|
| Type | Liquid-cooled, 4-stroke, SOHC |
| Cylinder arrangement | Single cylinder, forward inclined |
| Displacement | 660 cm3 |
| Bore x Stroke | 100×84 mm(3.94×3.31 in) |
| Compression ratio | 9.2:1 |
| Starting system | Electric starter |
| Lubrication system | Dry sump |
| Carburetor type x quantity | BSR33 x 2 |
| Carburetor manufacturer | MIKUNI |
| Spark plug type/manufacturer | DPR8EA-9/NGK |
| Spark plug gap | 0.8 – 0.9 mm (0.03~0.04 in) |
| Clutch type | Wet, Multiple-disc |
| Clutch operation | Left hand operation |
| DIMENSION & CAPACITY | |
|---|---|
| Overall length | 1,830 mm (72 in) |
| Overall width | 1,100 mm (43.3 in) |
| Overall height | 1,150 mm (45.3 in) |
| Seat height | 860 mm (33.9 in) |
| Wheel base | 1,245 mm (49 in) |
| Ground clearance | 265 mm (10.4 in) |
| Minimum turning radius | 3,300 mm (129.9 in) |
| With oil and full fuel tank | 193 kg (426 lb) |
| TRANSMISSION & GEAR RATIO | |
|---|---|
| Primary Reduction System | Spur gear |
| Primary Reduction Ratio | 71/34 (2.088) |
| Secondary Reduction System | Chain drive |
| Secondary Reduction Ratio | 40/13 (3.076) |
| Transmission type | Constant mesh, 5-speed forward, 1-speed reverse |
| Operation | Left foot operation |
| Gear ratio 1st | 31/12 (2.583) |
| Gear ratio 2nd | 30/18 (1.667) |
| Gear ratio 3rd | 27/21 (1.286) |
| Gear ratio 4th | 19/21 (0.904) |
| Gear ratio 5th | 19/21 (0.904) |
| Gear ratio reverse | 33/25 x 25/18 (1.833) |
| CHASSIS | |
|---|---|
| Frame type | Steel tube |
| Caster angle | 8∘ |
| Trail | 47 mm (1.85 in) |
| SUSPENSIONS | |
|---|---|
| Suspension front | Double wishbone |
| Suspension rear | Swingarm (link suspension) |
| Shock absorber front | Coil spring/oil damper |
| Shock absorber rear | Coil spring/gas-oil damper |
| Wheel travel front | 230 mm (9.06 in) |
| Wheel travel rear | 220 mm (8.66 in) |
| TIRES | |
|---|---|
| Type | Tubeless |
| Size: Front | AT21×7−10 |
| Size: Rear | AT20×10−9 |
| BRAKE | |
|---|---|
| Front brake type | Dual disc brake |
| Front brake operation | Right hand operation |
| Rear brake type | Single disc brake |
| Rear brake operation | Right foot operation |
| ELECTRICAL | |
|---|---|
| Ignition system | DC-C.D.I. |
| Generator system | A.C. Magneto |
| Battery type/voltage capacity | YTX14-BS/12V, 12AH |
| headlight type | Krypton bulb |
| Headlight wattage/quantity | 12V, 30W/30W × 2 |
| Tail/brake light | 12V, 5W/21W × 1 |
| Indicator light neutral | 12V, 1.7W x1 |
| Indicator light reverse | 12V, 1.7W x 1 |
| Coolant temperature | 12V, 1.7W x 1 |
| Fuse | 20 A |
Control and Speed
The Yamaha Banshee 350 is a high-powered sport all-terrain vehicle, which was made for riders who want heart-pumping off-road adventures.
Yamaha Banshee 350 Maximum Speed & Pick-up
Yamaha’s amazing idea was to put a 2-stroke, liquid-cooled, 347 cc engine in the Banshee 350, which gives 34 horsepower to the ATV. The engine was designed with a 6-speed manual gear system and equipped with a kick-start setup, which allows you to control the machine very well during riding.
The Yamaha Banshee top speed is ~75–80 mph (120–129 km/h), making it one of the fastest ATVs you can buy even today. The 350 Banshee is one of the few sports machines that was equipped standard with two exhaust pipes, giving it a special look and helping the ATV’s performance become smoother and its power delivery better.
Yamaha Banshee 350 top speed
In our test drive, this quad could hit 73 mph in 12 seconds on flat ground. It would be a bit slower on bumpy and rough terrain.
Stopping Power
This Yamaha ATV has a fluid-powered brake system with two front disc brakes and one rear disc brake. You work the front brakes with a lever on the handlebar, while the back brake works with a foot pedal. The fluid system makes sure the brakes respond well and stop you quickly.
The brakes also include a parking brake, which you control with a lever on the left side of the handlebars, and it locks the back wheel, giving extra safety when you park on a hill.
Shock Absorbers And Handling
The shock system has an independent double-wishbone front setup and a single-shock rear system, as with much of the other Yamaha models of that time. This ATV has a short wheelbase and sits low to the ground, giving it great stability, making it super agile and of course quick to respond to what the rider does.
The Banshee 350’s frame was engineered amazingly, to give the maximum of stability and control, letting riders move and handle the ATV easily, even at high speeds.
The steering system of the Banshee 350 is very responsive and reacts quickly to what you want. The handlebars placement was very well designed by engineers, to give great leverage and control, making it easy to move even in tight spaces.
Technical Specifications Highlights of the Yamaha Raptor 660R
Look, the Raptor 660R wasn’t just some big-bore quad that Yamaha slapped together – this thing was a seriously well-thought-out machine built to dominate pretty much anywhere you rode it. I’ve spent countless hours on mine, and the way they balanced raw power with actual rideability still impresses me today. Let me break down what made these beasts so special.
Engine
The heart of this monster was that ridiculous 660cc single-cylinder engine. Yamaha basically took what they knew from their dirt bikes and beefed it up for ATV duty.
Stock, these things put out around 38-42 horsepower, which doesn’t sound like much by today’s standards, but trust me – when that power hits in the lower RPMs, you FEEL it. The torque was insane for climbing hills or blasting through sand. Those dual carbs gave it awesome throttle response, though good luck getting them perfectly synced if you started bolting on aftermarket parts!
Transmission
The transmission was actually one of my favorite parts of the Raptor, with its 5-speed manual with reverse (pretty standard layout), clutch wet multi-plate that you worked with a good old cable and a final drive with 520 O-ring chain to a solid rear axle
That reverse gear was freaking magical when you’d wedge yourself between trees or need to back out of a bad line choice. The gearing felt just right too – enough grunt down low but still let you open it up on straightaways.
Chassis & Frame
Yamaha didn’t mess around with the frame, which was a tough tubular steel with one with a lighter aluminum subframe, a wheelbase of 49.2 inches and a ground clearance of 4.5 inches. (you learned to pick good lines real quick!)
- Seat Height: Tall at 33.9 inches
- Dry Weight: 398 lbs – definitely not the lightest quad out there
- Fuel Capacity: 3.2 gallons (just enough for a decent ride before refueling)
I’m not gonna lie – the 33.9 inches seat height was great for seeing over obstacles, but it made the quad feel a bit top-heavy in tight turns. Many a new rider found themselves picking up a tipped Raptor after getting too aggressive in corners.
Suspension System
This is where the Raptor really showed its strengths. The suspension setup was pretty advanced for the early 2000s. Yamha equipped this model with independent double wishbone front suspension, with a design that soaked up the rough stuff, having a 9.1 inches of travel which was plenty for most trail riding, having also a 5-way preload adjustable gas shocks that you could actually tune without an engineering degree.
Rear Suspension was a swingarm with a linkage-style mono-shock that worked surprisingly well.
The stock suspension was totally decent for casual bombing around trails and dunes, but if you were hitting big jumps or racing, you’d eventually want upgrades. My buddy dumped nearly two grand into his suspension alone, and I gotta admit – it was worth every penny.
Braking System
Nothing fancy here, but it got the job done:
- Front: Dual hydraulic discs with twin-piston calipers
- Rear: Single hydraulic disc with a single-piston caliper
- Controls: Right hand lever for front, right foot pedal for rear (like any normal quad)
The brakes were… fine. Not amazing, not terrible. You weren’t going to be doing any stoppies with the stock setup, but they’d haul you down from speed without drama most of the time. After a few hard rides, though, that rear brake would start to fade if you were heavy on it.
Electrical System
Simple but effective:
- Battery: Basic 12V, 12Ah sealed lead-acid
- Lights: Dual 30W halogens up front and a 21/5W taillight/brake light
- Starter: Electric only – no backup kick (which was occasionally terrifying)
The electrical system was surprisingly tough – I can’t count how many times I’ve seen Raptors with completely thrashed bodywork but lights and starter still working perfectly.
Tires & Wheels
The stock setup was clearly designed as a jack-of-all-trades:
- Front Tires: 21 x 7-10
- Rear Tires: 20 x 10-9
- Wheels: Aluminum rims, 10″ front, 9″ rear
These were… okay. The stock tires worked on most surfaces but weren’t great on any. First upgrade most people made was swapping to Padillas for the dunes, ITP Holeshots for the track, or some aggressive mud tires if that was your thing.
Performance Stats & Maintenance Stuff
- Top Speed: About 74 mph stock (though some claims they saw 80 on long straightaway)
- Horsepower: Around 38-42 hp before mods
- Torque: Roughly 40-45 Nm of stump-pulling grunt
- Oil: 10W-40 motorcycle-specific (don’t cheap out with car oil!)
- Oil Capacity: 2.1 quarts with a fresh filter
- Chain Slack: 1.0-1.4 inches (check it regularly unless you enjoy walking home)
Bottom line – the Yamaha Raptor 660R was a beast when it launched and honestly still holds its own today. The combo of that torquey engine, decent suspension travel, and aggressive ergonomics made it amazing for pretty much anything you wanted to do. Dunes? Yep. Trails? Absolutely. Making your buddies jealous? 100%. There’s a reason these things still command good prices on the used market 20 years later – they’re just that good.
Aftermarket Upgrades for Yamaha Raptor 660R
Let’s talk about modding your Raptor 660R. Honestly, this is where the real fun begins! Most of the guys I know spent more on upgrades than on the quad itself. The beautiful thing about these machines is how you can basically build a custom ride that matches exactly how and where you ride. Whether you’re a dune guy like me, a woods rider, or someone who hits the local track on weekends, there’s a whole world of parts to make your Raptor even more of a beast.
Engine Upgrades
Big Bore Kits
To install a big bore kit is terrifying but so worth it at the end!
- CP-Carrillo makes what’s probably the best kit out there – their 102mm forged piston setup is lightweight and gives you serious grunt. Not cheap though.
- JE Pistons makes a killer high-compression kit with a cylinder sleeve, but you’ll be dropping over $500.
- If you’re on a budget like I was when I started, check out the Namura 686cc kit for around $220. Not as fancy but gets the job done.
These kits bump up your displacement from the stock 660cc to around 686cc or more. The difference in torque is insane – my buddy’s modded Raptor will pull the front end up in third gear now!
Cams
Changing the camshaft is probably the best bang-for-buck mod you can do:
- Web Cams Stage 2 is my personal favorite – gives the Raptor an aggressive powerband that’ll make you grin like an idiot.
- Hot Cams Stage 1 is easier on the wallet and perfect if you’re mostly trail riding.
When I swapped in my Web cam, the difference was night and day – woke up the mid-range and top-end without killing reliability. Just be ready to re-jet those carbs!
Valvetrain Stuff
If you’re already in there for cams, might as well upgrade the valves:
- Kibblewhite makes great stainless steel oversized valves that really let the engine breathe.
- Their black diamond valves in stock size are cheaper but still way better than OEM.
Don’t forget stronger valve springs and retainers unless you enjoy the sound of valves floating when you’re bouncing off the rev limiter.
Exhaust Systems
Full Systems
Nothing changes the character of a Raptor faster than a good exhaust:
- HMF Competition Series has been my go-to for years. You can adjust the sound with different end caps, and the torque curve is perfect for trail and dune riding.
- Yoshimura RS-3 is top-of-the-line stuff if you’ve got $600+ burning a hole in your pocket. Worth every penny though.
- Big Gun Eco System is what I started with – $300-400 range and a solid performer.
Slip-Ons
If you’re not ready to drop cash on a full system:
- FMF PowerCore 4 or DG Performance slip-ons give you some gains without breaking the bank (under $250).
Just a heads up – you’ll get the best results pairing exhaust mods with proper jetting and airbox mods. My first exhaust install ran like garbage until I sorted out the jetting. Learn from my mistakes!
Air Intake & Fuel System
Filters & Intakes
Opening up the intake side is critical if you’re adding exhaust and engine mods:
- My setup is a Pro Design billet intake with a K&N filter and outerwear – absolute gold standard.
- If you’re watching your budget, grab a Uni foam filter. They’re washable, seal well, and filter great.
Airbox Mods
This is the free/cheap mod everyone should do:
- Just remove that restrictive airbox lid or get a pre-filtered lid from Outerwears. Instant throttle response improvement!
Jet Kits
Don’t skip this step if you modify anything else:
- Dynojet Stage 2 or 3 kits are what most shops will recommend.
- GPI Racing or Moose kits work well too if you’re doing it yourself.
I cannot stress this enough – proper jetting after intake/exhaust mods is ESSENTIAL. My riding buddy skipped this step and melted a piston. Expensive lesson.
Carburetor Upgrades
One of the Raptor’s few weak points is those twin Mikuni carbs – they’re a pain to sync and tune when you start modifying things. That’s why tons of riders (myself included) swap to a single carb setup:
- Lectron 38mm carbs are incredible – no jets to mess with, they basically self-tune, and throttle response is crisp as hell. Expensive but worth it.
- Keihin FCR 39mm is probably the most popular swap – excellent throttle response and easier to tune than the stock setup.
- Mikuni TM40 is great if you’re on a budget – under $300 for a solid upgrade.
Going to a single carb made my Raptor way more rideable – smoother power delivery across the whole RPM range. Plus when it’s time to clean or adjust, you’re only dealing with one carb instead of two!
Suspension Upgrades
The stock suspension is fine for cruising around, but if you’re jumping or racing, you’ll want upgrades ASAP:
Front Shocks
- Elka Stage 3 or Stage 5 shocks are amazing – fully adjustable for compression/rebound and custom-valved for your weight and riding style.
- Fox Float Evol RC2 shocks cost a small fortune but are incredible if you can swing it. Air shocks are super tunable.
- Budget option: grab some take-off shocks from a YFZ450 or check out Works Performance.
Rear Shock
Same brands apply for the rear, but consider adding a GT Thunder linkage while you’re at it – improves travel and makes the rear end much plusher.
A-Arms & Swingarms
- Lonestar Racing, Houser Racing, and Alba Racing all make great stuff.
- Extended A-arms seriously improve cornering and stability – total game-changer on high-speed turns.
- A longer swingarm gives you a better wheelbase for straight-line stability. I added 2 inches to mine and it tracks so much better at speed.
Electrical Upgrades
CDI Boxes
- Dynatek’s Dyna FS is what I run – adjustable rev limit, modified timing curve, simple plug-and-play install.
- Vortex makes good units too.
- If you’re on a budget, Procom CDIs are cheaper but have fewer tuning options.
Stator & Electrical Output
- If you’re running extra lights or accessories, grab a Trail Tech High Output Stator. Your battery will thank you.
- Upgraded ignition coils from MSD or Dynatek give better spark delivery. Worth it if you’ve increased compression.
Lighting Upgrades
- LED pod lights or light bars are a must if you ride at night. The stock halogens are basically glorified candles.
Brake Upgrades
Stock brakes get the job done, but if you’re riding hard or racing, you’ll definitely feel their limitations:
Brake Pads
- EBC “R” Series sintered pads are what I run – they handle heat way better than stock.
- Tusk DHH pads are great value for money if you’re watching costs.
Rotors
- Wave-style rotors from Tusk, EBC, or Galfer run cooler and shave weight.
Brake Lines
- Switching to stainless steel brake lines was one of my favorite upgrades – firmer lever feel and more consistent braking when they get hot.
Drivetrain & Transmission
Clutch Kits
- Hinson Racing clutches are the gold standard – what the pros use for a reason.
- EBC Dirt Racer or Barnett clutches are solid mid-range options.
- Tusk makes a Heavy Duty Clutch Kit that works surprisingly well for the price.
Sprockets & Chains
- I’ve always run Renthal sprockets and chains, but Sunstar and JT make good stuff too.
- Gearing changes are cheap and make a huge difference – I went with a 13T front sprocket for better acceleration in the dunes. If you’re more about top speed, try a 14T or drop teeth on the rear.
Axles
- Durablue axles are basically bombproof.
- Lonestar and RPM Dominator axles are great too.
I put a wider axle on mine and it completely transformed how it corners – so much more stable and planted.
Cosmetic & Ergonomics
This is where you make it yours:
Nerf Bars, Bumpers, Grab Bars
- Alba Racing, DG Performance, and Pro Armor all make good stuff.
- Not just for looks – they’ll save your plastic (and legs) when things get rowdy.
Plastics & Graphics
- Maier Manufacturing makes replacement plastic if yours is cracked or faded.
- Custom graphics kits from AMR Racing or Attack Graphics let you stand out.
Handlebars & Controls
- Switching to Renthal Fatbars or Pro Taper bars makes a huge difference in comfort and control.
- ODI Lock-On grips changed my life – no more glue or safety wire, and they don’t slip even when wet.
Seat Upgrades
- QuadTech and Ceet make good replacement seats.
- The absolute best is a custom foam/cover setup from Guts Racing – they’ll build it for your exact riding style and weight.
Man, I could talk about Raptor mods all day. The beauty of these machines is there’s always another upgrade around the corner. Start with what matters most for your riding style and keep adding as budget allows. My advice? Prioritize suspension and power delivery mods first – they make the biggest difference in how the quad actually rides.
| QUICK RECAP | |||
|---|---|---|---|
| Component | Best Option | Most Expensive | Budget Option |
| Exhaust | HMF Comp Series | Yoshimura RS-3 ($600+) | DG Slip-On ($200–250) |
| Intake | Pro Design + K&N | Custom Air Box Setup | Uni Foam Filter |
| Carb | Lectron | Keihin FCR / Lectron | Mikuni TM40 |
| Suspension | Elka Stage 3/5 | Fox Float RC2 | YFZ450 take-offs |
| Brakes | EBC Sintered Pads | Galfer Wave Rotors + SS lines | Tusk Pads + OEM Rotors |
| Clutch | Hinson | Hinson Complete Kit | Tusk or EBC Kit |
| Electrical | Dynatek CDI | Vortex CDI + MSD Coil | Procom CDI |
You know what I love most about the Raptor 660R? You can make it completely yours. I’ve seen bone-stock Raptors tearing it up at the dunes right alongside completely rebuilt monsters with barely a stock part left on them. Whether you’re pinching pennies or throwing money at your quad like it’s going out of style, there’s a mod path for every rider and budget. Some of my riding buddies went full custom with their Raptors, while others just did the basics and still had a blast. That’s what makes these machines so damn special.
But enough about mods – let me tell you how these beasts shook up the entire industry when they dropped.
Yamaha Raptor 660R vs. the Competition
Man, I still remember when the Raptor 660R first showed up at our local dealership in 2001. It was like someone had brought a fighter jet to a prop plane convention. Before the Raptor came along, we were all riding around on 400cc sport quads thinking we were hot stuff. The Honda 400EX was considered the gold standard, and the Suzuki LTZ400 was the new kid making waves.
Then Yamaha just casually rolls out this 660cc monster that made everything else look like a toy.
Seriously, it was the first time any manufacturer had the guts to build a true high-performance big-bore sport quad. That 660cc engine was a statement – Yamaha basically looked at the competition and said “cute toys you got there” before dropping the hammer.
I had a buddy who traded in his beloved 400EX after just one test ride on the Raptor. Said it was like going from a dirt bike to a street bike – that kind of difference in power and presence.
Let me break down how it compared to what else was out there back in those days…
The Key Players (2001–2005)
- Yamaha Raptor 660R
- Honda TRX 400EX
- Suzuki LTZ400
- Kawasaki KFX 400 (nearly identical to LTZ400)
- Polaris Predator 500
- Bombardier DS650
Each of these had its strengths—some were lighter, others more stable—but the Raptor made headlines with its raw power and aggressive stance.
| SIDE-BY-SIDE COMPARISON TABLE | |||||
|---|---|---|---|---|---|
| Spec | Yamaha Raptor 660R | Honda TRX 400EX | Suzuki LTZ400 | Polaris Predator 500 | Bombardier DS650 |
| Production Years | 2001–2005 | 1999–2008 | 2003–2008 | 2003–2007 | 2000–2006 |
| Engine Type | 660cc, liquid-cooled SOHC | 397cc, air-cooled SOHC | 398cc, liquid-cooled DOHC | 499cc, liquid-cooled DOHC | 653cc, liquid-cooled SOHC |
| HP (approx) | 38–42 hp | 27 hp | 30–33 hp | 40 hp | 44–46 hp |
| Top Speed (Stock) | 74 mph | 66 mph | 70 mph | 72 mph | 75 mph |
| Transmission | 5-speed w/ reverse | 5-speed w/ reverse | 5-speed w/ reverse | 5-speed no reverse | 5-speed no reverse |
| Carb/Fuel Delivery | Dual 33mm CV carbs | 38mm piston-slide carb | 36mm Mikuni carb | 42mm Keihin carb | 42mm carb |
| Weight (Dry) | 398 lbs | 375 lbs | 370 lbs | 415 lbs | 495 lbs |
| Front Suspension | 9.1” travel, dual A-arms | 8.2” travel | 8.5” travel | 10” dual A-arms | 9” dual A-arms |
| Rear Suspension | 8.7” swingarm | 9.1” swingarm | 9.1” swingarm | 11” rear travel | 10.5” swingarm |
| Ground Clearance | 4.5” | 4.3” | 4.7” | 5.0” | 4.8” |
| Seat Height | 33.9” | 31.9” | 32.4” | 33.5” | 34.5” |
| Fuel Capacity | 3.2 gal | 2.6 gal | 2.6 gal | 3.5 gal | 3.5 gal |
| Reverse Gear | Yes | Yes | Yes | No | No |
| MSRP (at release) | ~$6,499 | ~$5,699 | ~$5,599 | ~$6,199 | ~$6,799 |
Pros and Cons Breakdown
Yamaha Raptor 660R
- Most powerful engine in its class when launched
- Excellent low-end torque and top-end speed
- Aggressive styling and ergonomics
- Came with reverse (rare for big quads at the time)
- Heavier than most competitors
- Top-heavy, making it less nimble in tight turns
Honda TRX 400EX
- Legendary reliability
- Great handling and agility
- Simple, air-cooled maintenance
- Lacked power vs. bigger quads
- Basic suspension
Suzuki LTZ400 / Kawasaki KFX400
- Well-balanced between power and agility
- Liquid-cooled, DOHC engine
- Good suspension, reverse gear
- Slightly underpowered vs. Raptor and Predator
- Plastic skid plates prone to damage
Polaris Predator 500
- Powerful 500cc engine
- Great suspension travel
- Strong aftermarket support
- No reverse
- Heavier than most sport quads
Bombardier DS650
- Massive power, great for desert/dune riding
- Extremely stable at high speeds
- Big-bike feel
- Very heavy—approaching 500 lbs dry
- Lacked reverse, less maneuverable
Summary: Why the Raptor Was Special
The Raptor 660R wasn’t just fast—it brought something new to the table: a high-performance ATV with a reverse gear, serious torque, and trail-capable handling. It opened the door for big-bore sport quads and arguably forced the rest of the industry to evolve.
- Against the TRX400EX, it had more than 10 extra horsepower.
- Compared to the Predator 500, it had slightly less top-end, but better versatility.
- Against the DS650, it was lighter and more agile, better suited for trails.
At the time, if you wanted a quad that could rip through dunes, climb steep trails, and still turn heads in the paddock, the Raptor 660R was the go-to.

Suspension Height Adjustments
Another frequent question concerns how to adjust a quad’s ride height. Many riders want to either raise their machine for better ground clearance or lower it for improved stability.
If your ATV sits lower than you’d like, there are several ways to increase its height:
- Shock mounting brackets – Aftermarket brackets can raise or lower mounting points on both front and rear suspension
- Longer shock absorbers – Though more expensive than brackets, longer shocks tend to provide better reliability and functionality
- Larger tires – Moving up to taller tires (like 21-inch fronts) with fresh tread can add noticeable height
- Extended A-arms – While primarily designed to widen the stance, extended A-arms can sometimes create the visual impression of increased height
It’s worth noting that many used ATVs may not have their original factory suspension components. Older machines often pass through multiple owners who make various modifications. You might unknowingly have shorter shocks giving your quad a lowered stance without realizing it.
When considering suspension modifications, always think about how they’ll affect handling characteristics. A higher stance improves ground clearance but may impact stability, while lowering can improve cornering but reduce clearance for obstacles.
Choosing Quality Parts
Perhaps the most important advice for any ATV owner concerns parts selection. The market is flooded with aftermarket components ranging from premium brands to budget knockoffs, and choosing wisely can mean the difference between reliability and frustration.
When it comes to engine internals and critical components, this is what I recommend:
- Wiseco – Considered the minimum acceptable quality level for serious riders
- Namura and Athena – Lower-tier but still acceptable for less demanding applications
- Generic unbranded parts – Best avoided for critical components
Many riders wonder if budget parts are “just as good” as name brands, especially when they appear identical. The reality is more complicated. While budget parts may use the same molds or designs as premium brands, they typically cut corners in:
- Material quality
- Heat treatment processes
- Precision of machining
- Quality control standards
- Bearing and seal quality
This is particularly evident with components like crankshafts. A $150 crankshaft might visually resemble a $400 one from a premium manufacturer, but the metallurgy, bearings, and manufacturing precision will be substantially different. The budget version may contain more filler materials like tin in the steel to reduce costs, compromising strength and durability.
A good rule of thumb: For external accessories like handlebars or brake levers, budget parts might be worth the risk. For internal engine components or any parts subject to high stress, heat, or pressure, invest in quality brands with established reputations and warranties.
Popular Riding Destinations
For riders looking to explore new terrain, hill climbing destinations offer some of the most challenging and exciting experiences. Areas like Trevorton, Pennsylvania, have become legendary in the ATV community for their challenging ascents and technical terrain.
When researching new riding spots:
- Watch videos online to get a feel for the terrain
- Connect with local riding groups who know the area where you want to ride
- Check if there are organized events or meetups
- Verify that the area is legally open to ATVs
Hill climbing in particular requires specific machine setup and riding techniques. Proper tire selection, weight distribution, and throttle control become crucial for successfully conquering steep inclines.
The Lifecycle of Project ATVs
Many enthusiasts enjoy buying, rebuilding, and eventually selling ATVs as projects. This approach allows riders to experience different machines while developing mechanical skills and sometimes even turning a profit.
When taking on an ATV project:
- Set clear goals – Decide if you’re building for personal use, resale, or as a long-term keeper
- Document everything – Take photos and notes throughout the process
- Make smart upgrade choices – Consider which modifications will add the most value
- Know when to sell – The best time to sell is often when the machine is freshly completed and running perfectly
Some machines become “keepers” that owners hold onto indefinitely, especially if they’ve been part of a memorable build or have become synonymous with the owner’s identity in the riding community. These special quads often serve as benchmarks against which all future projects are measured.
Banshee 350: Closing Thoughts
The way you sit on the Banshee 350 is often praised for how comfortable it is. The handlebars are set up to let you control this ATV easily, and the footrests let riders shift their weight while turning with comfort.
Many say the Banshee 350 has a nice seat with enough cushion for long rides. But some riders have noticed the seat could be wider to better support your legs. Also, some have said it could be less slippery to keep you from sliding when riding up steep hills.
The lights on the Banshee 350 include a halogen headlight that gives bright light for the rider. The headlight sits at the front to give the best view on the trail. The rider can turn the headlight on or off with a switch on the handlebars.
The Banshee has a huge community of aftermarket parts, with seemingly endless custom pieces and add-ons available. This makes it easy for owners to change and personalize their machines however they want. From engine upgrades and suspension changes to look improvements, there’s no end to how you can customize a Banshee.
Despite all its good points, we’ve seen some problems with the Banshee 350. The ATV can be really noisy, which can be a problem for some riders, especially in places with noise rules. Also, the Banshee 350’s two-stroke engine can be tricky to keep up with and needs frequent attention to make sure it performs at its best.
| MAINTENANCE SCHEDULE | ||
|---|---|---|
| ITEM | ROUTINE | INTERVAL |
| Valves | Check valve clearance. Adjust if necessary |
6 months |
| Cooling system | Check coolant leakage. Repair if necessary. Replace coolant every 24 months. |
6 months |
| Spark plug | Check condition. Adjust gap and clean. Replace if necessary. |
6 months |
| Air filter element | Clean. Replace if necessary. |
Every 20-40 hours (more ofter in dusty or wet areas) |
| Carburetors | Check idle speed / starter operation. Adjust if necessary. |
6 months |
| Crankcase breather system | Check breather hose for crack or damage. Replace if necessary. |
6 months |
| Exhaust system | Check for leakeage. Retighten if necessary. Replace gasket if necessary. |
6 months |
| Spark arrester | Clean. | 6 months |
| Fuel line | Check fuel hose for cracks or damage. Replace if necessary. |
6 months |
| Engine oil | Replace (Warm engine before draining.) | 6 months |
| Engine oil filter | Clean. Replace if necessary. |
6 months |
| Drive chain | Check and adjust slack/alignment/clean/lube. | 6 months |
| Brake / Clutch | Check operation/fluid leakage/See manual. Correct if necessary. Check operation. Adjust if necessary. |
6 months |
| Wheels | Check balance/damage/runout. Replace if necessary. |
6 months |
| Wheel bearings | Check bearing assembly for looseness/damage. Replace if damaged. |
6 months |
| Steering system | Check operation. Repair if damaged. Check toe-in. Adjust if necessary. |
6 months |
| Upper and lower arm pivot and steering shaft | Lubricate | 6 months |
| Rear arm pivot | Lubricate | 6 months |
| Fittings and Fasteners | Check all chassis fittings and fasteners. Correct if necessary. |
6 months |
“
Yamaha Raptor660R – Q & A
ENGINE & PERFORMANCE
CARBURETOR & FUEL SYSTEM
TRANSMISSION AND DRIVETRAIN
ELECTRICAL SYSTEMS
SUSPENSION & STEERING
| TROUBLESHOOTING | |||
|---|---|---|---|
| System | Symptom | Possible Cause | Recommended Fix |
| Starting | Engine won’t start | Dead or weak battery | Charge or replace the battery. |
| Loose or corroded battery connections | Clean and tighten battery terminals and connections. | ||
| Faulty starter motor or solenoid | Test and replace the faulty component. | ||
| Blown fuse | Check and replace the blown fuse with the correct amperage. | ||
| Faulty ignition switch | Test and replace the ignition switch. | ||
| Issues with the CDI (Capacitor Discharge Ignition) | Test or replace the CDI unit. | ||
| Slow or hesitant cranking | Weak battery | Charge the battery. | |
| High resistance in starter circuit | Inspect and clean all connections in the starter circuit. | ||
| Binding starter motor | Inspect and potentially rebuild or replace the starter motor. | ||
| Engine | Engine stalls frequently | Low fuel level | Refuel the ATV. |
| Clogged fuel filter | Replace the fuel filter. | ||
| Carburetor issues (dirty, misadjusted) | Clean and/or rebuild the carburetor(s), adjust settings. | ||
| Vacuum leaks in intake system | Inspect and repair or replace damaged intake boots or hoses. | ||
| Faulty spark plug(s) | Inspect, clean, and/or replace the spark plug(s) with the correct type and gap. | ||
| Incorrect valve timing or adjustment | Check and adjust valve clearances according to the service manual. | ||
| Poor engine performance | Clogged air filter | Clean or replace the air filter. | |
| Carburetor issues (lean or rich mixture) | Adjust carburetor settings. | ||
| Low compression | Perform a compression test; may indicate worn piston rings, valves, or cylinder. | ||
| Exhaust blockage | Inspect and clear any blockage in the exhaust system. | ||
| Overheating | Low coolant level | Check and refill the coolant. | |
| Faulty thermostat | Test and replace the thermostat. | ||
| Radiator blockage | Clean the radiator fins. | ||
| Faulty water pump | Inspect and replace the water pump if necessary. | ||
| Backfiring/Popping | Lean fuel mixture | Adjust carburetor settings. | |
| Exhaust leaks | Inspect and repair or replace damaged exhaust gaskets or pipes. | ||
| Incorrect ignition timing | Check and adjust ignition timing (CDI is usually fixed timing). | ||
| Electrical | Dim or flickering lights | Weak battery | Charge the battery. |
| Faulty stator | Test and replace the stator. | ||
| Loose or corroded wiring connections | Inspect and clean all electrical connections. | ||
| No lights | Blown fuse | Check and replace the blown fuse. | |
| Faulty light switch | Test and replace the light switch. | ||
| Broken wiring | Inspect and repair or replace damaged wiring. | ||
| Battery not charging | Faulty stator | Test and replace the stator. | |
| Faulty voltage regulator/rectifier | Test and replace the voltage regulator/rectifier. | ||
| Issues with wiring harness | Inspect wiring harness for damage or shorts. | ||
| Transmission | Difficulty shifting | Misadjusted clutch cable or linkage | Adjust clutch cable or linkage according to the service manual. |
| Damaged or bent shift lever | Inspect and replace the shift lever. | ||
| Internal transmission problems | Requires internal inspection and repair or replacement of damaged parts. | ||
| Clutch slipping | Worn clutch plates | Replace the clutch plates and possibly friction discs. | |
| Misadjusted clutch cable | Adjust the clutch cable. | ||
| Brakes | Weak or no braking power | Low brake fluid | Check and refill brake fluid; bleed the brakes. |
| Air in the brake lines | Bleed the brakes. | ||
| Worn brake pads or shoes | Replace the brake pads or shoes. | ||
| Damaged brake rotors or drums | Inspect and replace damaged rotors or drums. | ||
| Leaking brake lines or cylinders | Inspect and repair or replace leaking components. | ||
| Brakes dragging | Sticking brake caliper or wheel cylinder | Clean and lubricate or rebuild the caliper or wheel cylinder. | |
| Incorrect brake pedal adjustment | Adjust the brake pedal. | ||
| Suspension | Rough or stiff ride | Low or incorrect tire pressure | Check and adjust tire pressure to the recommended level. |
| Damaged or worn shocks or struts | Inspect and replace damaged or worn shocks or struts. | ||
| Binding suspension components | Inspect and lubricate suspension pivot points. | ||
| Poor handling | Misaligned wheels | Check and adjust wheel alignment. | |
| Uneven tire pressure | Adjust tire pressure to be equal on both sides. | ||
| Damaged or bent steering components | Inspect and replace damaged steering components (tie rods, etc.). | ||